I did a count and discovered that I have 17 UFO's. Know what's funny about that? Before this year, I averaged one UFO for every year that I have been quilting. This year, I DOUBLED that, mostly because I quit my job and have more time to sew. And don't get me wrong, I have actually finished a lot of stuff this year! But I started a lot of stuff too, which all needs to be finished. And I know that I'm not the only one that has a ton of unfinished projects in my stash. So....
I started a facebook group to help people get in the spirit of digging them out, documenting them, and FINISHING some of them. And there's a little friendly competition too. No prizes, just bragging rights if you're the UFO Queen of 2013!
If you have any UFO's (doesn't matter if it's 2, or 17, or 106!) feel free to come join the group. You can find it here:
http://www.facebook.com/groups/UFOQueen2013
But, be prepared to unearth all those UFO's and write them all down! We are an embarrassment, guilt, and judgement free zone, all there for the same reason. And just think, once you've got all those projects done, how many goodies you'll have to give as gifts during the next holiday season!

I am a quilt pattern designer, an independent fabric designer, and a quilter for hire. Life's pretty insane most of the time, and sewing is my sanity! I will be posting my sewing adventures here, including stuff I design, patterns I test, awesome tools I might find, and whatever else might strike me at the time. Check out my quilt patterns, fabric designs, and finished items for sale in my stores, in the tabs right below this text.
Friday, December 28, 2012
Wednesday, December 26, 2012
Final photos of the Quillow!
It feels like it took FOREVER, but it's finally finished! I finished stitching the binding down at about 1pm on Christmas Eve, while my hubby was hiding in the basement putting a game table together for our boys. I still even had time to make some cookies and do some last minute shopping and wrapping, and make pizza for our traditional Christmas Eve dinner. I'm so glad it didn't take me even longer to finish it!
Anyway, here's a couple pictures of the finished quilt. You can see them on Facebook also, if you follow me on my page Quilting for Sanity.
This is the quillow, all folded up into a pillow that's a little bigger than a standard bed pillow. I appliqued this green Beetle on here, it's meant to look like the first Beetle he ever owned. I also added a green stripe all the way around the edge of the pillow pocket, you can kind of see it there at the bottom.


I'm quite happy with the finished quilt, and so is my hubby! We have 2 quillows already, but he's been asking me to make one that folded into a bed sized pillow for years. I did the math on it a couple years ago, but just recently finally got around to putting one together for him. I thought it would be an appreciated Christmas gift!
I hope to have a tutorial posted soon to my Craftsy page (though hubby doesn't want me to include the Beetle block since that makes his "special"!)
Anyway, here's a couple pictures of the finished quilt. You can see them on Facebook also, if you follow me on my page Quilting for Sanity.
This is the quillow, all folded up into a pillow that's a little bigger than a standard bed pillow. I appliqued this green Beetle on here, it's meant to look like the first Beetle he ever owned. I also added a green stripe all the way around the edge of the pillow pocket, you can kind of see it there at the bottom.

And here it is, all unfolded. It's 29 strips, with black and different shades of blue and teal. The back is a dark blue microfiber topsheet that we never used. I also sacrificed a matching pillowcase to back the pocket with so it would match up when it's unfolded like this.

I'm quite happy with the finished quilt, and so is my hubby! We have 2 quillows already, but he's been asking me to make one that folded into a bed sized pillow for years. I did the math on it a couple years ago, but just recently finally got around to putting one together for him. I thought it would be an appreciated Christmas gift!
I hope to have a tutorial posted soon to my Craftsy page (though hubby doesn't want me to include the Beetle block since that makes his "special"!)
Saturday, December 22, 2012
Time to make a pocket!
Today I started the pocket part of the quillow I'm making my husband for christmas. He's a VW enthusiast, so I thought I'd do something with that. I have had an applique pattern I drew of a Beetle sitting in limbo on my hard drive for over a year, so I dug that out, blew it up to a bigger block, and today I got it cut and partially stitched down. Here's a photo I took earlier today. Some pieces were sewn together, but nothing was sewn down to the block yet, so it's a little wonky looking. But you get the idea!

It's coming out really well, so I hope that this one will go up on my Craftsy store at the same time the quillow pattern and the stained glass pattern do.
Don't forget the Craftsy Christmas sale! Classes are up to 75% off thru midnight Christmas Eve! Craftsy has been totally amazing. I've been able to design and immediately release new patterns to a HUGE audience via their indie shop. I hope they're around for a long time!
New projects
I've been working really hard the last couple weeks on two projects. One, I've worked on while my husband is at work, and the other, while he's home. I'm still not done with either of them, but I'm done enough to share!
Project #1: Hubby's christmas quillow
 I just finished the quilt part of it last night. You can see Marvin in the corner there, he gives his approval! I still have to trim the raw edges, make the pocket, sew it on, and bind the whole thing, but the hardest part is done. It's a quilt-as-you-go strip quilt, and I did it all on my standard machine. I'm hoping I'll be able to finish most of what's left before he gets home from work today, but I don't even have binding yet! I think I'll be staying up late at least one night between now and Tuesday to finish it.
Project #2: Stained glass quilt pattern

This is a simple fat quarter/fat 16th/scrap quilt pattern I've been working on. My sample piece will be a twin size, and requires 80 blocks. I have 50 done so far, and everything ready to do the rest. As soon as it's done, I'll write up the pattern and add it to my Craftsy store!
So that's what I'm working on. Not to mention that I've had a dress pattern printed and waiting to be laid out and cut for weeks now. Hopefully after Christmas I can get back to my Craftsy classes so I can learn how to properly alter a pattern so it actually fits me.
Speaking of Craftsy...Don't forget the Craftsy Christmas sale is going on till midnight Christmas Eve! All online classes are up to 75% off. And if you can't decide, you can get yourself a gift certificate while the price is low, and decide later (that's what I did!)

Project #1: Hubby's christmas quillow

Project #2: Stained glass quilt pattern

This is a simple fat quarter/fat 16th/scrap quilt pattern I've been working on. My sample piece will be a twin size, and requires 80 blocks. I have 50 done so far, and everything ready to do the rest. As soon as it's done, I'll write up the pattern and add it to my Craftsy store!
So that's what I'm working on. Not to mention that I've had a dress pattern printed and waiting to be laid out and cut for weeks now. Hopefully after Christmas I can get back to my Craftsy classes so I can learn how to properly alter a pattern so it actually fits me.
Speaking of Craftsy...Don't forget the Craftsy Christmas sale is going on till midnight Christmas Eve! All online classes are up to 75% off. And if you can't decide, you can get yourself a gift certificate while the price is low, and decide later (that's what I did!)
Monday, December 17, 2012
Who DOESN'T want to win free fabric for life?

CLICK HERE to enter!
Wednesday, December 12, 2012
Quick goodie bag project
My youngest is in preschool, and Monday I was reminded that Wednesday (that's today!) is his class holiday party, and each kid will have a goodie bag that we're all supposed to drop a stocking stuffer into. Being that it's Christmastime and I'm trying not to spend money I don't have to (since my checking account is just about empty right now!) I decided to try to make something for the kids.
So I raided my stash and found some green Christmas fabric with french horns on it, and an ivory fabric with snowflakes on it. I cut 4x3 inch rectangles out of each. Then I took a cereal box out of my recycle bin and cut a little christmas tree out of it, with a trunk wide enough to allow for stuffing. I traced the tree onto the back of the ivory fabric with a water soluble marker, and then sewed those to the green blocks (right sides together), leaving the bottom of the trunk open. When I got to the point of the tree, I tucked a loop of thin ribbon into it before sewing it down.
Then I trimmed the seams and turned them right side out. My preschooler helped me stuff them (with a bag of stuffing I got from a friend, since it's something I never buy), and then I tucked the edges in and sewed them shut. So here's a pile of 28 christmas tree ornaments I made in about 4 hours Monday afternoon!

The goodie bags had a lot of little candies and dollar store toys and pencils and erasers...almost everything was consumable in some way, or will surely break within a few weeks. But they'll each have this nifty little ornament to keep. :)
It's funny, I didn't even think to put potpourri in them, but I noticed a few parents that pulled them out of the goodie bags to smell them lol! Good thing there's no smokers here! Anyway, if I do this again, maybe I'll think ahead and get something pretty smelling to tuck in there. But I did get lots of compliments, and people saying I'm so talented and things like that. If they only knew how easy this was...The secret's out now!
Sunday, December 9, 2012
Let it SNOW!
Well, it's ready for download! Come get your Let it Snow! Winter Mug Rug pattern here:
http://www.craftsy.com/pattern/quilting/home-decor/let-it-snow-winter-mug-rug/38934

http://www.craftsy.com/pattern/quilting/home-decor/let-it-snow-winter-mug-rug/38934

Monday, December 3, 2012
My new mug rug pattern will be available soon!
Last week I finished the top to my new mug rug pattern. I just need to get it quilted and bound and get some photos, and then I can get the pattern written up. What do you think?


Tuesday, November 27, 2012

Monday, November 26, 2012
Sunday, November 18, 2012
My indie shop on Craftsy!
I've been doing pattern designs for a little while now, but not like I have been lately! After the American Sewing Expo, I came home to check out Craftsy since I'd been given a free class voucher. And while I was there, I discovered they offer designers the ability to sell their patterns right there on their site! No startup cost, and no fees. Payments are sent through Paypal, so you lose a little there, but that's all. So I immediately got myself set up with a store, and posted the four patterns I had done at the time.
Since then, I've gotten four more done and posted, and while I'm not selling a ton, I'm doing ok for someone who's pretty much unknown. I spent two days in the #1 spot on the Trending Quilt Patterns list, with my Let's Talk Turkey Mug Rug pattern (it's dropped to #14 as of right now), and I had my Stepping Stones pattern in there for a few days as well.
I've been really happy with my store there so far, and I hope to keep making new ones! Here's what I made this morning. I just finished the pattern, and it's now available HERE as well.

Coming soon will be a snowflake mug rug, as well as a new tree skirt pattern! But now....what should I do with this mug rug? Hmm...
Friday, October 12, 2012
American Sewing Expo!
On September 29, I headed down to Novi, MI for the American Sewing Expo. I'd been looking forward to it for months by then, especially after sending in my entry for the Out of the Box Challenge, and being picked to compete in the Quick Stitch Challenge!
Right when I got there, I had to head to the Quick Stitch area for my time slot. We were given Elna machines to use during the challenge, and there were all kinds of supplies and notions to use. Our theme was to create a Hostess Gift, using a Kaffe Fassett fabric swatch set. I floundered pretty miserably! I rarely host parties, and also rarely go to any. And when I do, geez, I'm supposed to bring a gift?? So I had no idea what to make, and with only 75 minutes to finish the project, I decided to make a wrist purse.
I was doing ok, till it was time to put the finishing edging around it. But there wasn't any bias tape available, so I had to improvise and use ribbon. But the ribbon wouldn't stay in place, so in the 5 minutes I had left to stitch it on, I got about 2/3 of it on, and very badly! So I did NOT win that, and that is just fine with me. I did get a charm set from Craftsy, a certificate for a free craftsy class, and a free seminar at the expo. Plus, we got to keep all the fabric that was left from our fabric swatch sets :)

After that disaster was over (notice I didn't show you a closeup picture of my project? Yeah, there's a reason for that!) I headed over to see how I'd done in the Out of the Box Challenge. Here's a little background: Back in June, in the ASE newsletter, the contest was announced, and they said that the first 50 people to mail in the entry form would get a surprise package from American and Efird, and we would have to use the items in it to create a "quick gift". So in early July, I got a package, and in it was....a zipper and three spools of thread. Um...WHAT?! And the colors seemed like a crazy combo to me. There was a thick shiny lime green embroidery thread, a very thin blue metallic, a denim weight varigated thread in eastery colors, and an orange (persimmon, to be exact) zipper. All I could think to make was a purse, what else would I use the zipper for? So I dug through my patterns and came up with the Apropos Pack pattern. (I'll skip my horribly failed attempt to design a purse myself LOL). Then I had to figure out how to use all this thread, given that I don't own an embroidery machine. So I used the thread to quilt some black fabric into a diamond plaid before constructing the purse. And here's what I came up with!


So like I said, I headed out to find the Out of the Box Challenge area to see how I'd done. My purse is pinned to the very left end of the left table (sorry for the photo quality, I only had my phone with me that day!)


I didn't expect to win anything, so I was pretty giddy! I was also disappointed that I'd gone to the expo alone, so I had nobody to tell my exciting news to! I hurried back to find one of the gals I'd met in the Quick Stitch challenge to tell her, since she was the only person I knew there, and we chatted for a while.
Then I went to find a seminar to take since I had a free ticket. I took a one hour seminar on Trapunto and Quilt As You Go, and I'm very excited to try all the things I learned in that hour :) I need to pick up some water soluble thread, and I have also suggested to Craftsy that they find someone to do a class on the Cotton Theory, which was also discussed briefly in the seminar.
Then I went and spent all the money I had at one booth buying up stuff I'd need for the stuff I'd learned, wandered around to see the rest of the expo, and went home. In all, I was there for 4 hours total, had sewn for 75 minutes, spent 60 in the seminar, and probably spent 20 minutes goggling at my fancy yellow ribbon, and talking to a nice woman I'd met while I was over there. I got a pattern, a book, a Quilter's Pounce (finally LOL), and an adhesive dispenser, got some free fabric and my disasterous project, and spent less than $70 :) It was a pretty good time!
I've been waiting for almost 2 weeks now to get my purse back. They said they'd mail back all the projects that weren't picked up Sunday after the show. So today, I find a package left at my door. It's way too big and heavy to be my purse, but it's from the expo. And inside, I found this letter.

The good news is they are now calling it the 6th place winner! And they sent me this really nice Fiskar's paper cutter as a prize (I wonder if it'll cut fabric? Hmm...) The bad news is they're going to keep it (and my ribbon!! I wanted that more than the purse ROFL) for a year and display it at trade shows. My purse gets to go to more sewing shows than I do!
Anyway, that's been my experience with the American Sewing Expo this year. I'm glad I entered both contests, and would do both again in a heartbeat (though I hope if I do the Quick Stitch again, that the theme of the projects is something I can do in an hour!) I had a great time this year, and I'm looking forward to next year already. I hope there's some good contests in store! (How about one for quilters? hint hint...)
Right when I got there, I had to head to the Quick Stitch area for my time slot. We were given Elna machines to use during the challenge, and there were all kinds of supplies and notions to use. Our theme was to create a Hostess Gift, using a Kaffe Fassett fabric swatch set. I floundered pretty miserably! I rarely host parties, and also rarely go to any. And when I do, geez, I'm supposed to bring a gift?? So I had no idea what to make, and with only 75 minutes to finish the project, I decided to make a wrist purse.
I was doing ok, till it was time to put the finishing edging around it. But there wasn't any bias tape available, so I had to improvise and use ribbon. But the ribbon wouldn't stay in place, so in the 5 minutes I had left to stitch it on, I got about 2/3 of it on, and very badly! So I did NOT win that, and that is just fine with me. I did get a charm set from Craftsy, a certificate for a free craftsy class, and a free seminar at the expo. Plus, we got to keep all the fabric that was left from our fabric swatch sets :)
After that disaster was over (notice I didn't show you a closeup picture of my project? Yeah, there's a reason for that!) I headed over to see how I'd done in the Out of the Box Challenge. Here's a little background: Back in June, in the ASE newsletter, the contest was announced, and they said that the first 50 people to mail in the entry form would get a surprise package from American and Efird, and we would have to use the items in it to create a "quick gift". So in early July, I got a package, and in it was....a zipper and three spools of thread. Um...WHAT?! And the colors seemed like a crazy combo to me. There was a thick shiny lime green embroidery thread, a very thin blue metallic, a denim weight varigated thread in eastery colors, and an orange (persimmon, to be exact) zipper. All I could think to make was a purse, what else would I use the zipper for? So I dug through my patterns and came up with the Apropos Pack pattern. (I'll skip my horribly failed attempt to design a purse myself LOL). Then I had to figure out how to use all this thread, given that I don't own an embroidery machine. So I used the thread to quilt some black fabric into a diamond plaid before constructing the purse. And here's what I came up with!


So like I said, I headed out to find the Out of the Box Challenge area to see how I'd done. My purse is pinned to the very left end of the left table (sorry for the photo quality, I only had my phone with me that day!)

And I was shocked to find I'd won an honorable mention ribbon!

I didn't expect to win anything, so I was pretty giddy! I was also disappointed that I'd gone to the expo alone, so I had nobody to tell my exciting news to! I hurried back to find one of the gals I'd met in the Quick Stitch challenge to tell her, since she was the only person I knew there, and we chatted for a while.
Then I went to find a seminar to take since I had a free ticket. I took a one hour seminar on Trapunto and Quilt As You Go, and I'm very excited to try all the things I learned in that hour :) I need to pick up some water soluble thread, and I have also suggested to Craftsy that they find someone to do a class on the Cotton Theory, which was also discussed briefly in the seminar.
Then I went and spent all the money I had at one booth buying up stuff I'd need for the stuff I'd learned, wandered around to see the rest of the expo, and went home. In all, I was there for 4 hours total, had sewn for 75 minutes, spent 60 in the seminar, and probably spent 20 minutes goggling at my fancy yellow ribbon, and talking to a nice woman I'd met while I was over there. I got a pattern, a book, a Quilter's Pounce (finally LOL), and an adhesive dispenser, got some free fabric and my disasterous project, and spent less than $70 :) It was a pretty good time!
I've been waiting for almost 2 weeks now to get my purse back. They said they'd mail back all the projects that weren't picked up Sunday after the show. So today, I find a package left at my door. It's way too big and heavy to be my purse, but it's from the expo. And inside, I found this letter.

The good news is they are now calling it the 6th place winner! And they sent me this really nice Fiskar's paper cutter as a prize (I wonder if it'll cut fabric? Hmm...) The bad news is they're going to keep it (and my ribbon!! I wanted that more than the purse ROFL) for a year and display it at trade shows. My purse gets to go to more sewing shows than I do!
Anyway, that's been my experience with the American Sewing Expo this year. I'm glad I entered both contests, and would do both again in a heartbeat (though I hope if I do the Quick Stitch again, that the theme of the projects is something I can do in an hour!) I had a great time this year, and I'm looking forward to next year already. I hope there's some good contests in store! (How about one for quilters? hint hint...)
Garden Gnome quilt block pattern
I have designed a new quilt block pattern, which is available for $2 at my new Craftsy store! You know you love him ;)


You'll also find all my other patterns available there. And since Craftsy's indie store doesn't take a cut of the sale price, I've lowered the prices of my other patterns!
Wednesday, August 15, 2012
My new purse :)
This week, I've been making a new purse. I needed something just a little bigger than the "wallet-on-a-string" I've been carrying, but nothing as big as the "mom-purse" I used before that.
I bought a bunch of patterns over the last couple years from www.studiokatdesigns.com, and I decided to put together a Sidekick purse. It's got lots of pockets and a fold-out check register, not to mention the changepurse and the inside pocket. Seemed like a great purse! So I went through my stash and picked out some cool fabrics: A gray, black and silver metallic with swirls, and a great black tonal with swirls to match.
The pattern is tricky when you start putting the sides into the bag. I was cursing a lot for the last couple hours of construction, especially for the last step of adding the bias tape. I broke my thread about a dozen times AND broke a needle. But, it's done! Here's the final result.


I LOVE IT! I love that when I opened up my flap pieces, the placement was perfect and there was a focal point of the print centered. And I love how the black looks with the gray. I've gotten all the stuff I NEED in it, leaving out what I don't, and find I still have plenty of space. Took me about 2 days off and on to make it. If I make another one, I'm going to modify the placement of the ends of the zippers, I don't care for the gaps left from following the measurements in the directions, and I'll actually hand stitch the second side of the bias tape as the instructions recommend. I might flip the fold around in the check register too, so I can put both my checkbooks in it the right way (one's upside down in the top pocket right now LOL).
Friday, June 29, 2012
Look what my boys and I made today!
My boys have been asking for s'mores for a while. But we just can't ever seem to make it out back to build a bonfire (mostly because our bonfire pit is covered with a very large mound of hydrilla, but that's another story all together.)
They love chocolate covered anything. Most recently we did chocolate covered pretzel rods, which they really liked. And today, we did our s'mores. But not the traditional way...

We made s'mores pops! I recently bought a mini crock pot, one meant for keeping dips warm, so I could use it for dipping chocolate.
These were made with a bag of big marshmallows, half a bag of mini chocolate chips (or whatever kind of chocolate you like to use for dipping), three crushed graham crackers, and some mini pretzel sticks.
Stick the pretzel in the marshmallow, then dip in the chocolate, coat in cracker crumbs, and put it on a lined cookie sheet in the fridge to cool. Voila! The boys (all of them, even my husband) liked them a lot, and I'm sure we'll be making them again.
Anyone that's ever been to a renaissance faire knows that everything tastes better on a stick ;)
My entry into Inspire Me Monday, sponsored by Appliances Online and their best Washer Dryers.
Fabric Giveaway!
Ok, not my own. I just entered it myself. Anina over at That Quilt is giving away some rainbow fabric scraps from her rainbow Dear Jane. And I want them! But if I don't win, I'd love it if you do :) Follow the link below and enter!
http://twiddletails.blogspot.com/2012/06/anybody-out-there.html
http://twiddletails.blogspot.com/2012/06/anybody-out-there.html
Thursday, June 28, 2012
Dear Jane Block B-5
Dear Jane block B-5, Hot Cross Buns. 18 blocks done, 378 pieces of fabric so far. 207 more blocks to go!


Wednesday, June 27, 2012
Dear Jane block B-4
Here's Dear Jane block B-4, Chris' Soccer Field. I love paper piecing a little more every time I do it!


Dear Jane blocks B-2 and B-3
I did B-2 yesterday afternoon, but my computer was being uncooperative so I couldn't post! So here's my next two.
Block B-2, Sweet Tater Pie. I very much dislike how it came out. I've already mentioned how much I stink at hand stitching, so this is appliqued (very poorly due to not enough heat n bond...bad choice!) I WILL be redoing it. As of yesterday, I was going to wait till I had learned how to do hand applique, but after doing block B-3, I've changed my mind and now know what I'll do.

Block B-2, Sweet Tater Pie. I very much dislike how it came out. I've already mentioned how much I stink at hand stitching, so this is appliqued (very poorly due to not enough heat n bond...bad choice!) I WILL be redoing it. As of yesterday, I was going to wait till I had learned how to do hand applique, but after doing block B-3, I've changed my mind and now know what I'll do.
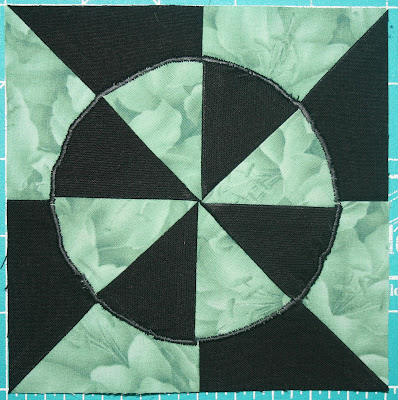
And Block B-3, Mirror Image. I will be redoing block B-2 with pieced curves because this one turned out so much better. I like this one as much as I dislike the last one!

Tuesday, June 26, 2012
Dear Jane block B-1
Started Row B today! This is block B-1, Bachelor Buttons. I tried it with the freezer paper and the reverse applique, by hand. Twice actually. I am just NOT good at that. So here's my B-1 with plain old heat-n-bond applique, with a blanket stitch to hold it down.
I do love my plaid though!

I do love my plaid though!

Monday, June 25, 2012
The rest of Dear Jane Row A!
I haven't posted a block in a little bit, so I'm catching up. I completed Row A this morning! :D
Block A-8. This was my first successful attempt at paper piecing. I discovered thatquilt.blogspot.com and started following the tutorials on that site. It's really great if you're doing a Dear Jane yourself!

Block A-9. More paper piecing. I think I love it a little.

A-10. Not my favorite block. I'm not great at any kind of hand stitching, so I had to do this reverse applique with my machine. Kind of weird looking, but I don't hate it enough to do it again ;)

A-11. More paper piecing, and more of this crazy hand applique. I was trying to do the inset Y-seams but I couldn't get it to turn enough to be able to stitch it down that way. So more "applique" by machine. Hoping it's not too obvious when the whole quilt is done!

A-12. A little off but not too bad.

A-13. The tutorial I was following showed this one being appliqued all around the main star part, but I managed it all by machine. The seams weren't as hard to turn this time. And it's one of my favorites so far!

And that's the end of Row A!
Friday, June 15, 2012
My 6 Week rotating dinner menu!
I know this is completely unrelated to quilting (unless you consider that doing this might give me some peace of mind and more time to quilt LOL). But I wanted to share anyway.
I have done this before, a few years ago, but I only had 3 weeks worth of meals at the time. I guess we've tried some new things since then because I now have 6 weeks worth of meals that I make and my family likes. And we tend to not like having the same thing too often. So I decided to put together a rotating calendar with all the meals my family likes, and this way we will not have the same thing for dinner more often than once every six weeks. AND it'll make it easier to do the grocery shopping, and to get things out to thaw.
Each meal is written on 3M Post-It tape, which resembles masking tape but the adhesive is the light stuff on the back of a sticky note. That way I can rearrange or replace meals if necessary, without having to use white out, or completely start the calendar over (since it's just written on paper in markers). I also have a little piece of this movable tape marking which week we're in on the left side of the calendar!

Next thing I need to do is do a weekly starter shopping list, that will have all the items I need for each week of dinners. I can then add the other non-dinner items, or scratch out the stuff I already have in the house. That way I won't forget anything!
And guess what?? Someone liked my idea enough to feature it on her blog! Thanks for the boost! Be sure to head over and check it out :)
UPDATE: I'm now in week 6 of my calendar. I'm discovering that I need to do some rearranging! I had originally put the more time consuming meals on the weekends because I was still in the mindset of a working mom. But now that I'm home during the day, and we're doing family stuff on the weekends, I need to reverse that mentality. So after this week is over, I'll be moving some things around.
I have also updated the location of this calendar, it's on my refrigerator door instead of on the side of the cabinet next to it. Since it's on the door now, I can use a circle magnet to circle what's for dinner that day, and my son likes to be the one to move it to the next day. He seems to like that he can just look at the fridge and know what to expect that night!
Friday, June 8, 2012
Woo hoo!
I am no longer a full-time engineer! As of yesterday, I'm out of the working world, and will be staying home full-time with my boys. This will finally give me time to get some things done (like maybe some laundry and dishes!) so we can enjoy our weekends as a family for a change. I'm very excited, and thought I'd share!
Thursday, June 7, 2012
Dear Jane Block A-7
This is Dear Jane block A-7, Dad's Plaids. It's the trickiest one so far, I'd never done curves so I had a little trouble. I think it came out ok though. Far from perfect, but better than expected!


Monday, June 4, 2012

Sunday, June 3, 2012

Dear Jane Block A-1
For some crazy reason, yesterday I sat down and started a Dear Jane quilt. If you haven't heard of it, check it out here, and pick up a copy if you're interested in doing one of your own! In short, it's 225 tiny blocks brought together into one GIANT sampler quilt. I'm doing mine in an Around the World color scheme, using the color wheel I use for picking out colors for my pinwheel swap to get the colors right. The first block took me about an hour! I decided to start going in order, but I'm sure I'll skip some here and there (especially considering I don't have enough blue-violet fabrics to do all of those blocks).
So here's Block A-1! It's called "Pinwheel Gone Awry".

So here's Block A-1! It's called "Pinwheel Gone Awry".

Thursday, May 17, 2012
Free applique block for today - Owl!

http://dl.dropbox.com/u/79336899/Owl1.pdf
Enjoy, and of course, send pictures!
quiltyshannon@yahoo.com
Monday, May 14, 2012
Want to make your own turtle blocks?

EDIT: I have moved this block to my store on Craftsy. It's now available for purchase HERE for $2.
This is a block I designed for a quilt I'm making for my friend's niece.
If you like this one, check out my Monkeying Around pattern, available HERE in book form, or HERE electronically. Also, check out my mystery quilt patterns, Stepping Stones and Starry-Eyed Surprise. And of course, keep checking back here for more free block patterns, like this one.
Enjoy, and send me pictures!
quiltyshannon@yahoo.com :)
Linking up to these crafty parties!
It’s so Very Cheri, Sew Can Do, Singing Three Little Birdies, Add a Pinch, I should be Mopping the Floor, Polly Want a Crafter?, The Gunny Sack, Skip to my Lou, Craftomaniac, Keeping it Simple, Creating Really Awesome Free Things, Its A Blog Party, A Pinch of Joy, Making the World Cuter, Mad in Crafts, Bringing Beauty, Ladybug Blessings, Moms By Heart, Home Stories A to Z, Sugar Bee Crafts, New Nostalgia, House of Grace, Jillify It, Cherished Bliss, My Favourite Finds, Tip Junkie, Coastal Charm, Not Just a Housewife, A Bowl Full of Lemons , Funky Polkadot Giraffe, Hope Studios, Organising Homelife, Raising 4 Princesses, Celebrating Family, Carolyn’s Homework, The Blackberry Vine, The Kurtz Corner, Sassy Sites, A Little Tipsy, Gingersnap crafts, Time Warp Wife, The Thrifty Home, Its a Very Cherry World, Mommy by Day, Crafter by Night, Rook No.17, Today’s Creative Blog, DIY by Design, The Organised Housewife, A Vision to Remember, Positively Splendid, The Frugal Girls
Thursday, May 3, 2012
Gearing up for some quilting!
Recently, I bought a used Gammill long arm. And when I say used, I mean VERY used. It's a VERY old machine, so old that the serial number is 3 letters and 3 numbers. I've discovered it was sold in the mid-80's and was one of the first ones they ever built. And the lady that sold it to me told me that at one time, it was used to quilt a bedspread for Neil Armstrong. There's no paperwork to prove that, and it didn't affect the price, so I take that with a grain of salt.
So, the table has been in the garage for a while, waiting for space in the house big enough (14' is tough to find!). And this weekend, I found it, and we got it in. Yesterday I was home for the day and got the rollers put on and the machine up on the carriage, and am almost ready to go! I'll be reloading the green and purple geometric I've been trying to finish for a few years now. I got about a quarter of the way through on my old setup before I ran out of throat space and was almost flattening out points where the machine wouldn't reach anymore!
There's a couple minor things that need to be fixed on the table, but my husband's a handy guy and said he can fix it right up. As soon as that's done, I'll be ready to roll! We also found an add-on stitch regulator from The Grace Company that he is 99% sure he can make work. If so, I'd have a fully stitch regulated machine and a 14' table for a fraction of the price of a new one. This is very exciting!
Thursday, April 19, 2012
How fun is this?
A plaid gecko! I love using such a structured looking fabric in such a curvy shape!

Saturday, April 14, 2012
Turtles and Turtles and Turtles!...And a gecko too
Back to work on the latest toddler quilt project today. I finished up the turtles, and even got through one of the geckos. 5 more blocks to go and it'll be ready for assembly!


Subscribe to:
Posts (Atom)