Wednesday, July 16, 2014

Check out the Offbeat Oxford shirt pattern by Terra's Treasures Designs!

Ok, so I normally don't sew clothes, at least not for myself. I'm no good at fitting myself since my dress form doesn't look anything like me. Luckily, my two boys are pretty true to size (at least on top!) so I can sew for them sometimes. But let's be honest, boys patterns are usually all the same things. Occasionally though, a good boys pattern comes out that isn't your typical t-shirt, jeans, or plain button up shirt. This is one of them!


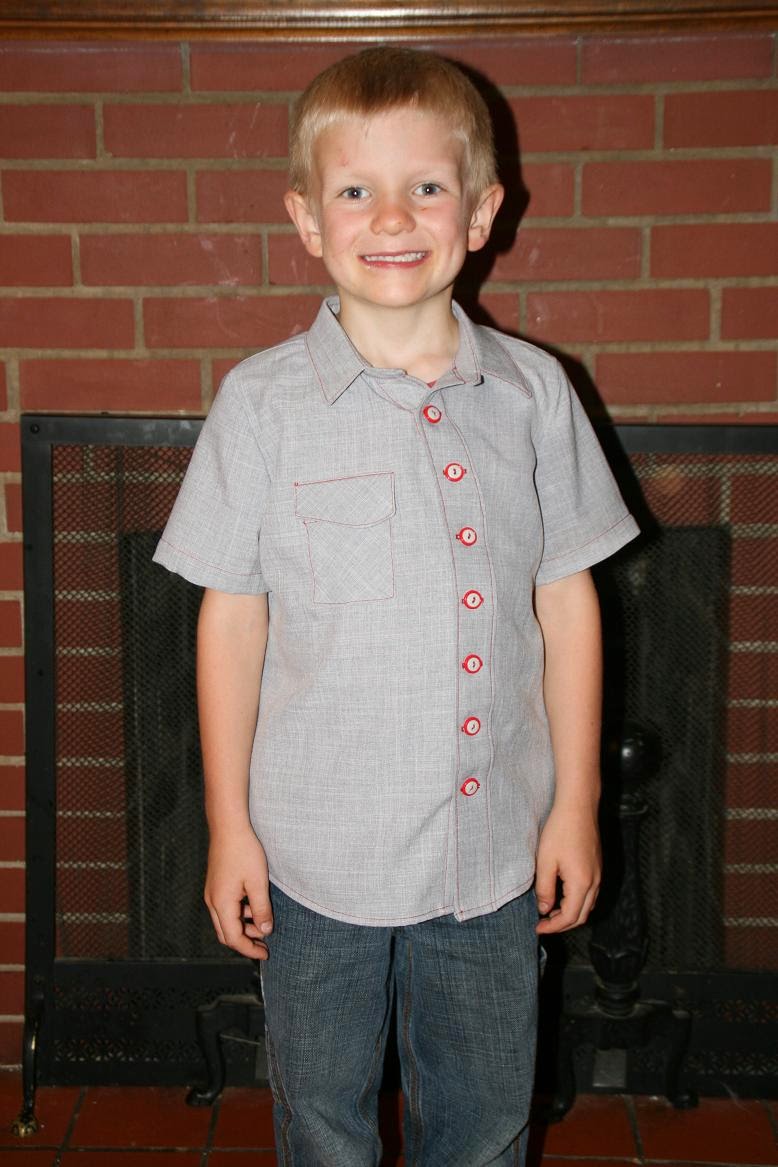
Here's the Offbeat Oxford by Terra's Treasures Designs. It's a fun take on a boys button up shirt, but with some visual interest. The row of buttons curves off to one side, and the pocket flap is a little different too. There are instructions included for doing a professional finish on the seams too, but I didn't do them.


I decided to make the shirt gray. My 6 year old came to the store to pick out buttons with me, and insisted on red ("Come on mom, it's MY shirt!"), so I used red thread for the top stitching, and fit a small gray button in the center of each red button.


He was so excited to put it on when it was done! I see myself making a few more of these for him. I'll be more careful around the collar stand, which was my only real hang up (only because I'd only ever sewn one collar before this and it was 5 years ago.) The pattern was easy to follow with plenty of photos and diagrams. I'm really pleased with how this turned out, and I'm sure if I make another one, it will be even better! I may even give the professional seaming a try next time.


(He was such a good sport...it's not even 55 degrees here this morning!)

So if you're looking for patterns for your boys, pop over to Terra's Treasures today, where you can get this pattern for 25% off! I'll be bookmarking her site as well, knowing that I can go there for boys patterns that don't look like everything else!

Friday, April 25, 2014

Bettie's Designer Pattern Swap

Get Your Crap Together
A while back, I joined an amazing group of ladies on Facebook. This group is for aspiring pattern designers, who are looking to make a name for themselves in the wide world of PDF patterns. Most of them are children's clothing designers, but they welcomed me right in, even though I can't sew a stitch properly when it comes to clothing (unless you count the pj pants I sew for my boys!)

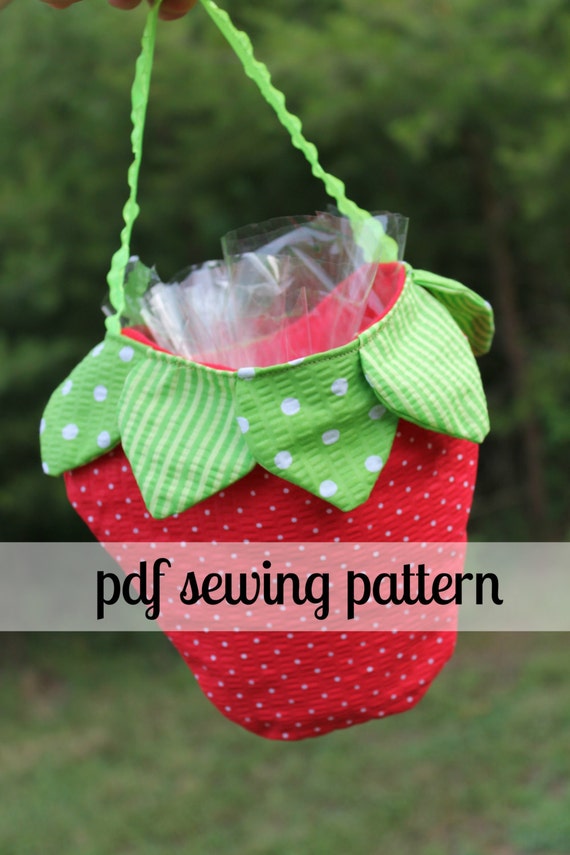
We recently swapped some patterns among us, and the pattern I got is the Strawberry Shortcake Purse, by Ruby and Jack. I don't have girls, but I LOVE to sew a purse, and this one is so cute and easy!


So one morning, I sat down and started cutting. I didn't have the ribbon the pattern called for to make the strap (as a quilter, I just don't use much of it, so I never buy it), so I sewed a strip of fabric into a ribbon instead. And about an hour after I started cutting, it was finished!


This is a quick easy project that can easily be done in a hurry. It would make an adorable gift bag for a little girl's birthday. Or for a springtime birthday party, you could make a bunch of these and use them as goodie bags!

It's cute little patterns like this that make me want a daughter! But alas, I don't have one, and neither of my boys would have stood with this on their arm for a photo! So, I got the next best thing. This bag is a little small for me to carry myself, so I gave it to my good friend's daughter, who's 5. She was quite happy to show it off for the camera too!

`

Want one for your own little ones? Head over to Ruby and Jack Sewing Patterns on Etsy. Or, you could enter the Bettie's Basket giveaway, and maybe win a copy, plus a copy of patterns from lots of other designers, including me! You can enter the giveaway right here. And be sure to visit the pages of the other designers and show them some love!

Thursday, March 20, 2014

Oops...I Scrapped My Pants! A new free paper piecing tutorial!

That's another one done! I just uploaded "Oops...I Scrapped My Pants!" to my Craftsy shop, and it's another FREEBIE!! This one is a paper piecing primer, using the freezer paper method, and a simple block I designed to look like a pair of pants. With enough of these blocks, you can make a cute scrappy quilt. But most importantly, you can learn to paper piece if you don't already know how!


It's a nice simple block that finishes to 6" square. Just four straight seams and some trimming, and the block is done! And you can arrange them a lot of different ways.


Here's a few, but the ladies that tested the pattern came up with others :)

Here's a great mini by Kitty Wilkin over at The Night Quilter. I love how even the scraps are scrappy!


Gwen Denluck made a mini as well, using some hippie fabric scraps she had. I love these!


Here's another awesome mini from Tracey White at The Quilted Cricket. And how about a close up of this recycled jeans block she made??

I love this block so much!

Thank you to everyone that tested this pattern!

As I said, this is a free tutorial, so you can head on over to my Craftsy Shop to add it to your library!

Thursday, March 6, 2014

Games To Go is a go! Get your pattern today!

In case you don't follow my Craftsy Shop, the pattern for Games To Go is now available for purchase! I have it posted for $8 through March 23, after which the price will go up to $10. So if you've been waiting, head on over while there's a price break. And if you're not following my shop, follow me while you're there!


Make it in traditional checkers or chess colors, or make a set for that couple that loves rival football teams or colleges. It's a great way to customize the game for the player!

The pattern is available HERE.

Wednesday, March 5, 2014

Games To Go Chess and Checkers Game/Pillow!

It's finally done!

Games To Go: Checkers & Chess Game/Pillow!


This is a 34 1/2" square checkerboard quilt with a quillow-style pocket sewn to the back for storing both the game pieces and the board itself.

 There are 32 reversible game pieces, with chess pieces on one side, and checkers on the other.


And when game time is over, the board folds up and flips into the pocket on the back, and the pieces fit into the zippered front of the pocket, keeping it all nice and neatly together. And it's mostly soft materials, so it doubles as a little pillow (zipper side down, of course). The best part is you never have to worry about stepping on that game piece that got left out because these won't feel like stepping in a bear trap (you know what I mean if you've ever stepped on a Lego in bare feet!)

I'm trying to step out of my comfort zone. Yes, it's still a quilt! But it's got a zipper, so that's a start, right?

What do you think?

Want to hear about it when this pattern is available? Or just want to follow me to see what I will make next? Sign up for my newsletter! Just click the tab at the top to sign up.

Friday, February 28, 2014

Final BIG Pattern Giveaway!

If you didn't get a chance to enter my Aspiring Designers Challenge giveaway on February 22 (which will have a winner chosen this weekend), or even if you did and you just want another shot...Now, you can enter to win a copy of EVERY pattern that was released during the challenge! That's right, ALL the new patterns, plus some bonus patterns from a few other designers as well! It looks to be adding up to about 15 patterns in all. How about that? If you'd like to enter, click over to PatternRevolution.com and check it out! You have about a day and a half to enter from right now :)

Good luck!

Wednesday, February 26, 2014

A brand new newsletter...and what am I working on now?

Just a quick post to share my news: I started a newsletter today! I'm kind of excited at the idea that I have enough to talk about to warrant a newsletter (even if it's all in my head haha!) Anyway, if you're interested in staying up to date on what I'm working on and my new pattern releases and such, click the tab at the top to sign up for my newsletter.

And just what am I working on? Well, the last couple days, I have gotten back to work on something I started for my boys just after Christmas. They love to play chess and checkers. Even my 5 year old! So I started sewing up a set for them. The pieces have been done for about a month (one side has appliqued chess pieces, the other is all one color, matching the chess pieces), and the board top has been done too. I got hung up on the pocket to store it all in, and then had to put it aside for a while. But I'm back to it, the pocket is figured out, and I'm ready to do the final assembly. Then I'll get it written up and tested, and it'll be posted in my Craftsy store after that. So it's moving along nicely and should be finished and available soon!


What do you think? Follow my blog with Bloglovin

Saturday, February 22, 2014

Windowboxes starts today!


I'm very excited to be a part of the Aspiring Designer's Challenge! I have been designing quilts for a little bit now, and before today, I had 18 patterns available in my Craftsy Shop. I am now ready to release my fourth mystery quilt! This one is called Windowboxes, and it starts today!

Windowboxes is presented in 4 sizes: lap, twin, full, and queen/king. If you're doing your first mystery, or maybe your first quilt, the lap size is perfect. This is a pretty easy project, no complicated piecing or weird angles or special tools needed (beyond the standard quilting tools). The fabric requirements, cutting instructions, and pre-sewing instructions are available today. Next Saturday, I will upload a new file to Craftsy, overwriting the first one, which will also include the first clue. Each week after, I will do the same, adding a new clue each time till the mystery is solved and the top is complete.


While I can't show you photos of this quilt (it IS a mystery, after all!), I can show you photos of my past mystery quilts, so you can see the types of quilts I design.

My first mystery was called Stepping Stones, and I designed it as a fundraiser for the Susan G. Komen 3 Day (I didn't end up raising enough to walk, but the pattern did raise some money before the fundraising deadline).


My second was called Starry-Eyed Surprise, which I did as another fundraiser for the same walk.


My most recent mystery is called Waste Not, Want Not! I gave it that name because while I was still in the designing stages of this pattern, I was out driving one day and had this epiphany. I HATE wasting fabric. I will skimp as much as possible when I cut so I use as little as possible to get the result I want. That day, I realized that I could design this quilt and use the cutaway pieces to create another baby quilt top! In fact, by the time I was done designing, I had enough extra blocks (that would have been scraps had I not stitched them together before clipping them off) to add a couple borders and make TWO baby quilt tops. I had almost no waste from this pattern, and that made the frugal part of my brain really happy! And the fun part is that I didn't say anything about the bonus baby quilt tops till the second to last clue was released, so it was a surprise!

Queen sized quilt top

One of the bonus baby quilt tops...SURPRISE!


So now that you've seen my first three, it's time for my newest mystery. I have been hard at work designing it for a while, and I'm excited to release it as part of this Aspiring Designer's Challenge. I hope you'll play along! If you've never done a mystery quilt, they're a lot of fun, and it's a surprise at the end when you finally get to see the completed top. Each week, I'll post the next "clue", and you sew it up and set it aside till later, when it's needed for another clue. You'll sew in easy, manageable steps, but you won't see the final product till it's done! And if you've never done a quilt top at all, they're a fun way to start because you can learn basic techniques without being overwhelmed with having the entire pattern in front of you at once. You have a whole week to complete each step before starting something new.

Mystery quilts are the reason I got into quilting in the first place. I came across one online 7 years ago and decided to give it a try (having barely sewn a stitch before that), and I had so much fun doing it! I hope that you'll take a look and give it a try. If you do, please join my Facebook group, Mystery Quilts by Shannon, where you can post pictures, ask questions, and chat with other mystery quilters. Also, be sure to follow my blog, either here on Blogger or on Bloglovin', to get updates on what patterns I'm working on.

Sunday, February 9, 2014

Aspiring Designer's Challenge...and a new mystery quilt coming soon!

Hi! I'm Shannon, and I'm the pattern designer of ShannonMac Designs. And those that follow my blog might be asking...Why is she introducing herself on a blog that's been established for so long? I'll tell you. I have joined in an Aspiring Designers Challenge, so hopefully, there will be many new readers on my blog, starting with this post! This challenge includes many other great pattern designers, and I'm excited to be a part of it. I believe I am the only quilt designer in the bunch though, so if you clicked a link in a post about the challenge to get here, I'm glad you made it!


So now that you're here, here's what I've got for you...


I know many of you have been waiting, so...my next mystery quilt will begin February 22!

This time, instead of hosting it in a facebook group and then releasing it on Craftsy after the big reveal, I am releasing it as a mystery on Craftsy. The pattern price will be $5 while it's still a mystery, and will go up to $7 once the mystery is revealed. On February 22, I will be uploading the fabric requirements and cutting instructions to my Craftsy Shop. Then each Saturday morning, I will upload a new file, replacing the old one, which will include everything up to that point, including the new week's clue. This way, you can download the new file each week, and at the end, it's all still kept together in one file. Sounds good, huh?

The cool thing about Craftsy shops is that once you have a pattern in your library, it's yours to download and access forever, no worries of losing it. AND, if I update it, you will be notified that the file has changed, and you can download the new copy. I'll be using that feature to my advantage, when I upload a new file with one additional clue each week!

You can find my Craftsy Shop HERE. If you click 'Follow' on my shop page, you'll get an email when new patterns are posted there. Or follow my blog HERE, and I'll be posting when it's released here (as well as some giveaways coming up!)

If you've never followed one of my mystery quilts, you can see the first three I designed HERE, HERE, and HERE! You can also join my mystery quilt group on Facebook HERE. Hope to see you there!

New blog URL

To anyone that has been following my site, I am changing my address. The mrsmunchy up there is an old username, but the blog was transferred to my new email long ago. So to tie it to my new "name", I'm changing it. Please change your bookmarks and bloglovin' links, if you have them, to reflect the new address:

http://shannonmacdesigns.blogspot.com

I felt I need to change this now, while I'm still unknown enough that it won't hurt me LOL. I have some news that I'm about to announce, and before I get extra traffic to my blog, I want to have things really nailed down, especially a URL I can live with for a while!

Also, I'll be eliminating the Quilting for Sanity!! name. I've loved that name! But it's time to kind of grow up and be serious if I want to grow my pattern designing as a business. That is my hope, that one day this will be my "real" job!

Help me make the switch painless by changing any links you might have to reflect this. And watch for my next post! Thanks!

Friday, February 7, 2014

Another finished UFO

Here is my latest finish! This is the second quilt I ever started, a mystery quilt from Planet Patchwork called Snow Business. I started this New Years Day 2007, the day after I started my FIRST quilt (another mystery quilt!) I had been hand quilting this one, but I decided I didn't like what I had done, and I pulled it all back out, and put it on the long arm instead. I am much happier with it, especially with it being done!


I quilted it with a meandering stars pattern. So happy it's finally done!

Friday, January 10, 2014

New pattern available!

Remember that star pattern I made for my Mother-In-Law, that I posted about here? I just posted the pattern in my Craftsy shop, so you can make one too! You can get it HERE!


Friday, January 3, 2014

Freezer Paper patterns?

Yup!

I hate to cut out my original copies of my patterns. I have a tendency to lose just one piece, which sometimes makes the pattern useless. While I still worked, I would run a copy of the pattern pieces, so I could cut the copy and keep my original intact, and never worry about losing that one piece.

But now that I don't work anymore, I don't have access to a printer that'll print bigger than letter sized paper. That's fine normally, but for some patterns I have, I need 8 1/2" x 14" or 11" x 17" to make my copies. So instead of moping about it, or going through the trouble of scanning and piecing prints together, this is what I do.

I trace the pattern onto freezer paper! It works really well when you're fussy cutting too, which I did recently with my Quattro Bag I made (pattern from StudioKat Designs). I used this amazing peacock fabric from Timeless Treasures, and I wanted to get the perfect cut for the pouch piece.

First, I trace the pattern piece onto freezer paper and cut it out, then, I press it onto the front side of the fabric, lining it up over the area I want to fussy cut.


Then I hold it up to a window or a light, and make sure that what shows through is exactly what I want to cut out. If not, I peel it off and adjust it, and press it on again (that's the best part about freezer paper, it sticks over and over.)


Once it's pressed onto the exact area I want to cut, I cut it out.


Voila! The perfect pouch piece with the peacock fussy cut into it.


It's a little extra work, but it makes fussy cutting so much easier. And since I already wanted an extra copy of the pattern pieces, it worked out well anyway. And for the fusible pieces, just pin them instead of pressing them.

Friday, December 27, 2013

Handmade Christmas gifts - Pt.2

After I finished the quilt for my mother-in-law, I turned to finishing the quilt I'd started for my son. He had picked out the pattern and colors himself, but I think he forgot he asked for it LOL! I got the quilt onto the long arm the Friday evening before Christmas, started quilting it on Saturday, and finished it Sunday afternoon. I did the binding on Monday while the boys were at the movies with my in-laws (great timing!) He wanted it to be WARM. So there's 2 layers of 6.8oz polyester batting in it, and it's backed with black fleece. Take that!

And here's the final result. I am really pleased with how it turned out, my intersections looked a lot better than some of my previous projects. I guess that means I must be getting better!


This pattern is called Diamond Double. I picked it up at my LQS recently. My son had seen it once when I had to pop in for a cut of fabric, and asked me a couple weeks later if I'd make it for him :)


The center section is quilted with a loopy design, with some stars mixed in.


I debated the quilting on this one. I am relatively new and inexperienced with my long arm and free-motion quilting in general, and I always worry I'll "ruin" the project with bad quilting. But because this quilt was staying home, and I was pretty sure my son wasn't going to care what the quilting looked like as long as the quilt was warm and in the pattern he picked, I decided to be a little experimental. I got on pinterest and started poking around, and found a few nice simple designs I thought I could probably do in the blue border and the black corners, and modified another one to fill the inner black border. Then I filled in the wider black border with a simple winding line. I did a little doodling with these designs before I started actually stitching, to make sure I could do the transitions properly when I turned the corners. It's not perfect, but I'm really happy with it anyway. And my son LOVES it (and sure enough, doesn't care about the quilting hahaha!)


This is the second of 2 finishes for me in December. If you missed Part 1 and the quilt I made for my mother-in-law, you can read that HERE. And if you're looking for motivation to finish some projects of your own, check out my Facebook group, UFOQueen2013 (I can't change the name now lol). It's a great group for motivation and inspiration!

Linking up at:
December Finishes  
The Free Motion Quilting Project


Handmade Christmas gifts - Pt.1

Now that Christmas is in the past, I can post photos! This is a king sized quilt I made for my mother-in-law.


She was pretty surprised when she opened the box!


I did a simple all-over meander with some free-motion stars mixed in. I stitched in the ditch around the batik stars, and used the Magic Binding technique to bind it. I'm glad she liked it!


I was pretty happy with how it turned out!

This is the first of 2 finishes for me in December. Be sure to read Part 2 to see the quilt I finished for my son!  And if you're looking for motivation to finish some projects of your own, check out my Facebook group, UFOQueen2013 ( I can't change the name now lol). It's a great group for motivation and inspiration!

Love it? As of 1/10/14, this pattern is available in my Craftsy shop! Stop in and download your copy, and make one for yourself :-)

Linking up at:

December Finishes  
The Free Motion Quilting Project

Friday, November 22, 2013

Another 2013 Finish

I've been hard at work at the longarm machine to get this one done :) Took a few days for me to get the binding stitched down, I've never done it by hand before. But it's finally done, so take a look!


This one is currently available for sale in my Etsy Shop!

Or you can get the pattern to make your own in my Craftsy Shop!

Friday, November 15, 2013

FLASH SALE!

Hey everyone! There's a flash on crafting supplies going on this weekend! If you need fabric, you can find it up to 65% off, and yarn is up to 80% off. Friday and Saturday only, so hurry over! And as always, there are 23 FREE mini classes available, so you can learn something new while you're at it. Come take a look, you never know what you'll find for a great deal :) Just click a banner in this post to be taken right to the fabric or yarn sale :)

Craftsy